
There’s something truly irresistible about a well-made veggie pizza recipe—the kind that makes your kitchen smell like an Italian pizzeria and has everyone hovering around the oven in anticipation. It starts with a perfectly crispy, golden-brown crust that’s sturdy enough to hold all those delicious toppings but still light and airy on the inside. Then comes the gooey, melty cheese, stretching with every bite, creating that oh-so-satisfying pull. But the real stars of the show? The vibrant, garden-fresh vegetables that bring a medley of flavors, textures, and colors to each slice.
Picture it: crisp, sweet bell peppers in shades of red, yellow, and green adding a satisfying crunch; earthy mushrooms soaking up all the garlicky goodness; thinly sliced onions caramelizing slightly in the oven’s heat for a touch of sweetness; and juicy cherry tomatoes bursting with bright, tangy flavor. Maybe you toss in some black olives for a briny contrast, or a sprinkle of fresh basil for that fragrant, herby finish. The beauty of a veggie pizza is that it’s endlessly customizable—you can keep it classic with a traditional marinara base or switch things up with a garlicky white sauce, pesto, or even a drizzle of balsamic glaze for a gourmet touch.
Whether you’re a lifelong vegetarian, a pizza purist looking for something new, or just trying to sneak more veggies into your diet (or your kids’), this dish strikes the perfect balance between nutrition and indulgence. It’s hearty, satisfying, and packed with wholesome ingredients—without sacrificing an ounce of flavor. Plus, it’s the ultimate crowd-pleaser, making it a go-to meal for family pizza night, casual gatherings, or even a solo dinner when you just want something comforting yet wholesome.
So go ahead, grab your favorite toppings, preheat that oven, and get ready to experience the joy of homemade veggie pizza—because when it’s done right, every slice feels like a little celebration. 🍕✨

Homemade veggie pizza isn’t just delicious—it’s also a fantastic way to enjoy a guilt-free comfort food. By using wholesome ingredients and a lighter crust, you can indulge without compromising on health. Whether you opt for a classic tomato sauce base or experiment with pesto or garlic-infused olive oil, the flavors will always shine through. The best part? Making your own veggie pizza allows you to control everything from the crust’s crispiness to the amount of cheese, ensuring a perfect slice every time. If you’re ready to take your pizza night to the next level, this easy and flavorful recipe is exactly what you need!
Ingredients you will need for the Veggie Pizza:
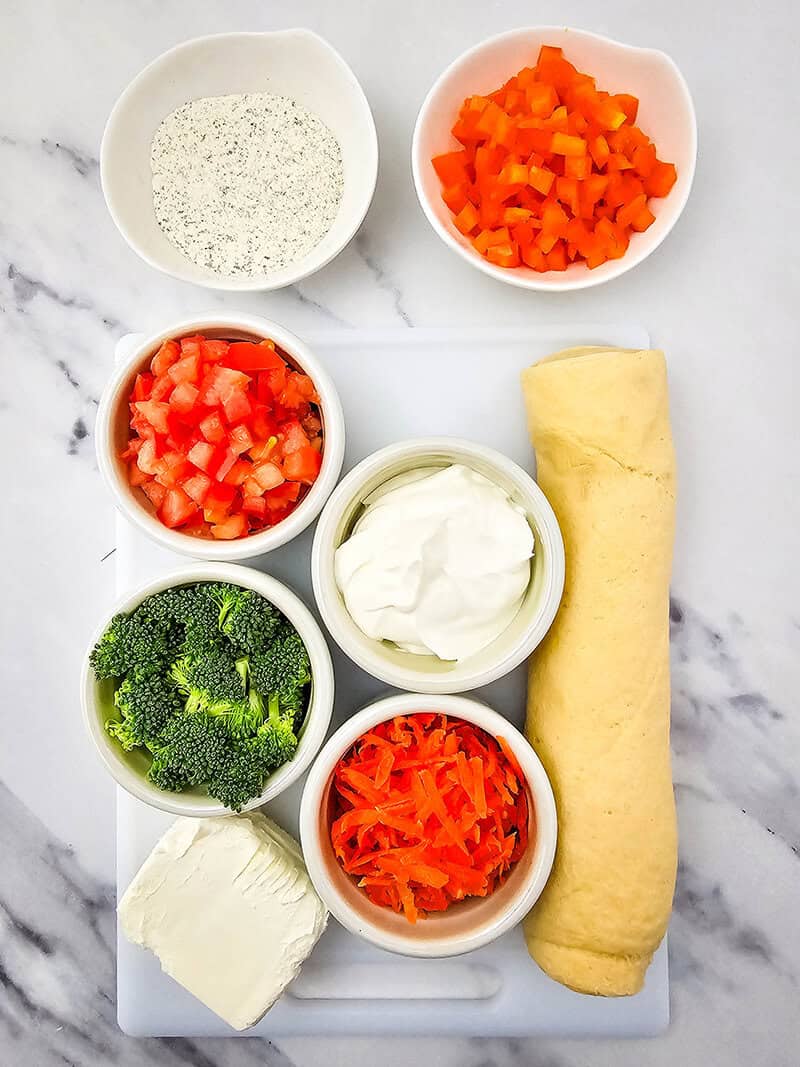
Ingredients
- 8 oz tube of crescent dough sheet
- 4 oz cream cheese, softened
- ½ cup sour cream
- 1 oz ranch seasoning packet
- ¾ cup small broccoli florets, ½ inch in size
- 1 roma tomato, diced
- ½ cup orange or yellow pepper, diced
- ½ cup shredded carrots
Tools
Follow the recipe below to create this perfect Veggie Pizza!
Instructions for the Veggie Pizza:
Step 1: Prepare Your Veggies—Chop, Slice, and Shred Like a Pro!
Before we get to the glorious, melty cheese and crispy crust, let’s talk about the real stars of the show: the veggies! A well-prepped veggie pizza is all about balance—some veggies bring crunch, others add sweetness, and some infuse that perfect hint of savoriness. So grab your cutting board and let’s get chopping!
Choosing Your Veggies:
You can mix and match based on what’s in your fridge or go all out with a gourmet selection. Here are some fan-favorite toppings:
✔ Bell Peppers – Red, yellow, green, or orange, these add a crisp, sweet crunch. Slice them into thin strips or dice them for even coverage.
✔ Mushrooms – White button, cremini, or portobello, mushrooms add an earthy, umami-rich flavor. Slice them thin so they cook evenly.
✔ Onions – Red onions bring a mild sweetness, while yellow onions caramelize beautifully in the oven. Thin slices are best!
✔ Cherry Tomatoes – These little bursts of juiciness roast beautifully in the oven. Slice them in half to keep them from rolling away.
✔ Spinach or Kale – Adds a fresh, slightly bitter contrast to all the cheesy goodness. Tear or chop into smaller pieces.
✔ Olives – Black or green, these add a salty, briny punch. Slice them up so you get a little in every bite.
✔ Zucchini – Mild in flavor but fantastic when roasted. Thin rounds or half-moons work best.
Pro Tips for Veggie Prep:
⭐ Avoid Soggy Pizza! Some veggies (like mushrooms and zucchini) release water as they cook. To prevent a soggy crust, pat them dry after slicing or give them a quick sauté before adding them to your pizza.
⭐ Keep It Even – Try to cut your veggies into uniform sizes so they cook at the same rate.
⭐ Load Wisely – If you love all the veggies, go for it! Just be mindful that too many toppings can weigh down the crust.
With your veggies prepped and ready to go, you’re one step closer to pizza perfection! Now, onto the crust… 🍕✨
Step 2: Preheat the Oven – Let’s Get Things Nice and Toasty! 🔥
Before we even think about assembling that delicious veggie masterpiece, it’s time to preheat the oven. Setting your oven to 375°F (190°C) ensures that your crust bakes up crispy and golden while your toppings get perfectly roasted and melty.
Why Preheating Matters:
✔ Even Baking – Starting with a hot oven ensures your pizza cooks evenly from crust to toppings.
✔ Crispy Crust Goals – A properly preheated oven helps prevent a sad, soggy crust. No one wants that!
✔ Melty, Gooey Cheese Perfection – Cheese loves a good high-heat bake to get that stretchy, bubbly goodness.
Pro Tips for Preheating Like a Pizza Pro:
⭐ Use a Pizza Stone or Baking Sheet: If you’re using a pizza stone, place it in the oven while it preheats. This helps crisp up the bottom of your pizza. No stone? No problem! A baking sheet works great too—just give it a few minutes to warm up before adding your pizza.
⭐ Convection vs. Regular Bake: If you have a convection setting, it can help circulate heat more evenly. But if you’re sticking with a standard bake setting, your pizza will still turn out delicious!
⭐ Let It Fully Preheat! Don’t rush it—give your oven a solid 10-15 minutes to reach the full 375°F before popping your pizza in.
Once your oven is nice and hot, it’s time to move on to the next step: crust magic! 🍕✨
Step 3: Roll Out That Crust – The Foundation of Pizza Greatness! 🍕
Now that your oven is all warmed up and ready to go, it’s time to lay the groundwork—literally. We’re using a crescent roll sheet as our crust, which means you get that buttery, flaky goodness with zero dough-making effort. Win-win!
How to Prep Your Crust:
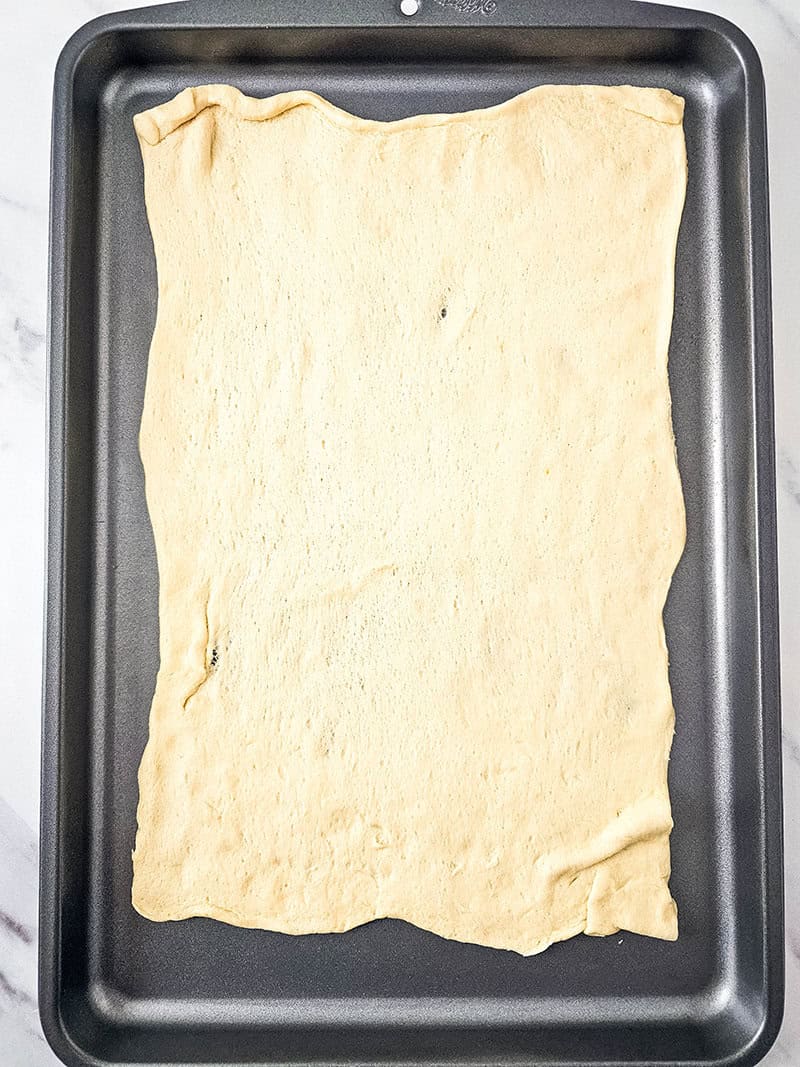
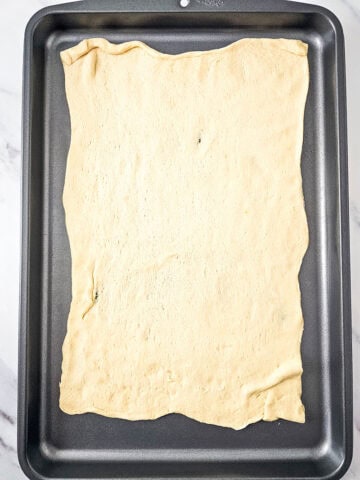
1️⃣ Unroll the Crescent Sheet – Gently place the sheet onto a non-stick baking sheet or a parchment-lined pan. If using crescent roll dough (instead of a sheet), pinch the seams together to create one solid crust.
2️⃣ Stretch It Slightly – Use your hands to carefully spread the dough out just a little so it covers the pan more evenly. No need to go overboard—just a light stretch will do!
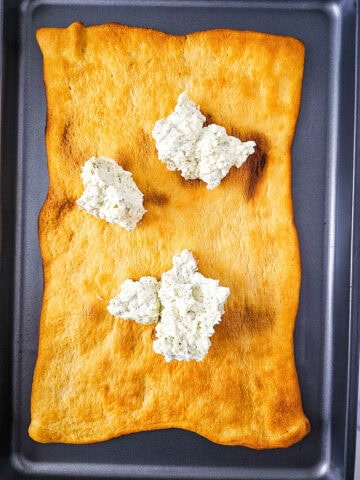
3️⃣ Pre-Bake for 8-10 Minutes – Pop it in your preheated 375°F oven and let it bake until it turns a light golden brown. This step ensures your crust won’t end up doughy once we load it up with all those delicious toppings.
4️⃣ Let It Cool Slightly – When it’s done baking, remove it from the oven and give it a couple of minutes to cool before adding your sauce and toppings. This helps prevent a soggy crust!
Pro Tips for Crust Perfection:
⭐ Craving Extra Crispiness? Pre-bake a couple of minutes longer for a crunchier base. Just keep an eye on it!
⭐ Want a Thicker Crust? If you love a more pillowy pizza base, don’t stretch the dough out too much. Let it puff up slightly as it bakes.
⭐ Flavor Boost! Before baking, brush the dough with a little olive oil and sprinkle on some garlic powder or Italian seasoning for extra flavor.
Once your crust is golden and slightly cooled, it’s time for the fun part—sauce and toppings! 🎉🍕
Get your free Weekly Meal Planner!
Step 4: Let It Cool – Patience, My Pizza-Loving Friend! 🍕
I know, I know—the smell of that golden, buttery crust fresh out of the oven is tempting, but trust me, this step is important! Before we go slathering on the sauce and piling up those delicious veggies, we need to let the crust cool for about 10 minutes.
Why Cooling Matters:
✔ Prevents a Soggy Crust – If you add sauce while it’s still piping hot, it can make the crust too soft.
✔ Easier to Handle – A warm crust is delicate. Giving it a few minutes to cool helps it firm up slightly, making it easier to spread toppings without tearing.
✔ Better Flavor Absorption – A slightly cooled crust holds onto sauce and toppings better, so every bite is chef’s kiss perfection.
Pro Tips While You Wait:
⭐ Speed It Up! If you’re in a hurry (because who isn’t?), transfer the crust to a cooling rack to let air circulate underneath. This helps it cool faster and keeps the bottom crisp.
⭐ Use This Time Wisely! While your crust is cooling, go ahead and prep your sauce and toppings so you’re ready to assemble in record time.
Once your crust has cooled just enough, it’s time to bring on the sauce! 🎉🍅

Step 5: Whip Up the Creamy, Dreamy Sauce! 🥄✨
Now we’re getting to the really good stuff—the rich, tangy, ranch-infused layer that takes this veggie pizza to the next level! Instead of a traditional tomato sauce, we’re using a savory cream cheese spread that’s smooth, flavorful, and the perfect base for all those fresh veggies.
How to Make the Sauce:
1️⃣ Grab a Medium Bowl – You’ll need a sturdy bowl for mixing, and maybe a spoon or rubber spatula to get everything nice and smooth.
2️⃣ Add the Ingredients:
✔ 1 block (8 oz) cream cheese, softened (leave it out for about 30 minutes so it’s easier to mix)
✔ ½ cup sour cream for a little tangy creaminess
✔ 1 packet (about 1 oz) ranch seasoning mix for that signature herby, garlicky flavor
3️⃣ Mix It Up! Use a hand mixer or a good ol’ spoon to blend everything together until it’s smooth and lump-free. If the cream cheese is still too firm, you can microwave it for 10-15 seconds to soften it more.
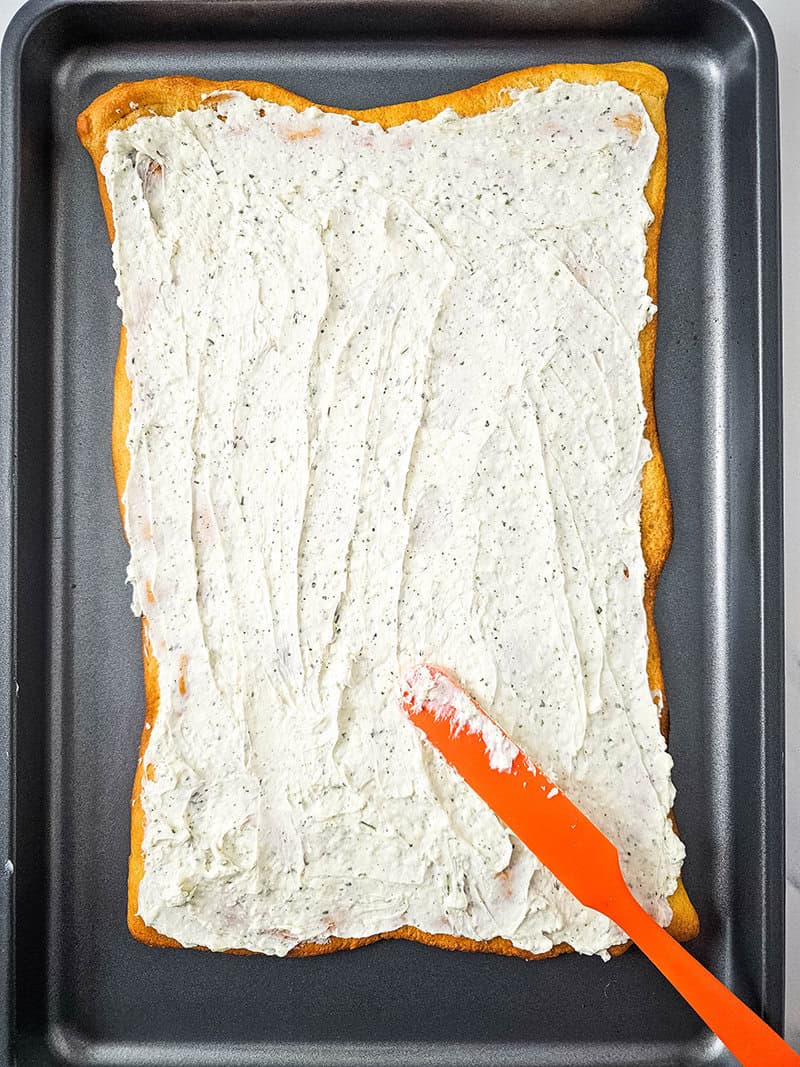
Time to Spread the Love:
✔ Evenly Spread Over the Cooled Crescent Crust – Use the back of a spoon or an offset spatula to get a nice, even layer. Make sure to go all the way to the edges so every bite gets that delicious creamy goodness!
✔ Keep It Smooth – No need to go too thick; just a nice, even coat will do. If you have extra spread left, don’t worry—it makes a great dip for crackers or veggies!
Pro Tips for the Perfect Spread:
⭐ Want a Lighter Version? Swap out the sour cream for plain Greek yogurt for a protein-packed alternative.
⭐ Kick It Up a Notch! Add a little shredded cheddar cheese or a pinch of garlic powder to the mix for even more flavor.
⭐ Chill It for Extra Firmness – If you prefer a thicker, sturdier spread, pop the whole thing in the fridge for 10-15 minutes before adding your toppings.
Now that your base is creamy and delicious, it’s time for the grand finale—all those fresh, crunchy veggies! 🥒🌶️🍅
Step 6: Load It Up with Veggies & Chill! 🥒🌶️🍅
It’s finally time for the grand finale—piling on all those fresh, colorful veggies! This step is where your masterpiece really comes to life, turning your pizza into a crunchy, vibrant, flavor-packed dish.
How to Top Your Veggie Pizza Like a Pro:
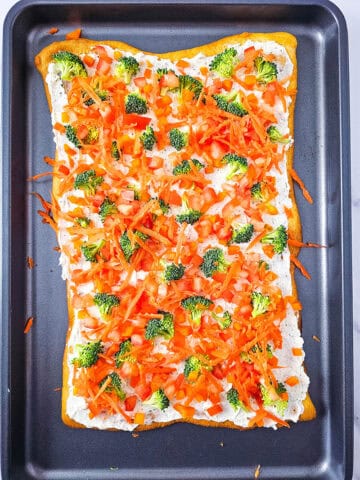
1️⃣ Evenly Sprinkle Your Prepped Veggies – Spread them out so every bite is full of fresh, delicious crunch! Use any combo you love, but here’s a classic mix:
✔ Diced bell peppers – Red, yellow, or green for sweetness and crunch
✔ Chopped broccoli – Tiny florets add a fresh, slightly crisp bite
✔ Shredded carrots – A pop of color and a little natural sweetness
✔ Sliced cherry tomatoes – Juicy and bright!
✔ Diced cucumbers – Cool and refreshing (add right before serving so they stay crisp)
✔ Chopped green onions – A mild onion flavor that ties it all together
2️⃣ Optional Toppings for Extra Flavor:
✔ Shredded cheddar cheese – Because everything’s better with cheese! 🧀
✔ Black olives – For a salty, briny contrast
✔ A sprinkle of fresh parsley or dill – Adds a fresh, herby touch
✔ A drizzle of balsamic glaze – For a gourmet finish
Chill Until Ready to Serve! ❄️
✔ Once your veggie pizza is fully assembled, pop it in the fridge for at least 30 minutes before serving. This helps the flavors meld together and makes it easier to slice.
✔ Serve chilled and cut into squares or rectangles for easy snacking.
Pro Tips:
⭐ Want Even More Flavor? Let the pizza chill for a few hours—the longer it sits, the better the flavors combine!
⭐ Serving for a Party? Assemble everything ahead of time, but wait until right before serving to add cucumbers so they stay crisp.
⭐ Leftovers? Store in an airtight container in the fridge for up to 2 days (though it’s so good, it probably won’t last that long!).

Step 7: Slice & Serve – Let’s Get This Party Started! 🎉🍕
Now that your veggie pizza is perfectly chilled and packed with fresh flavors, it’s time for the final step—cutting it into bite-sized perfection! Whether you’re serving a crowd or just your hungry family, slicing it the right way makes all the difference.
How to Cut Like a Pro:
✔ Use a Sharp Knife or Pizza Cutter – A large chef’s knife or a rolling pizza cutter works best for clean cuts without smushing your beautiful toppings.
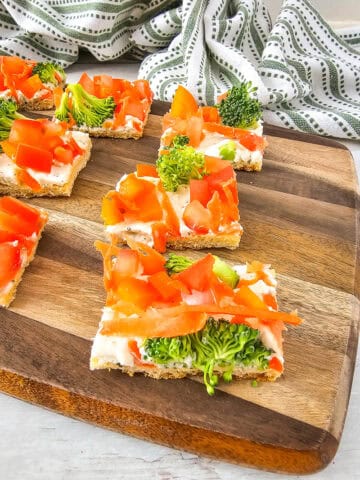
✔ Cut Into 48 Perfect Party Pieces –
1️⃣ Start by cutting the pizza lengthwise into 8 strips
2️⃣ Then, cut across into 6 rows
3️⃣ This creates 48 small, 2-bite squares—perfect for easy snacking!
✔ Want Bigger Pieces? – If you’re making this for a casual family meal rather than a party, feel free to cut them into larger squares or rectangles.
Pro Tips for Serving:
⭐ Use a Spatula – Gently lift each piece with a flat spatula to keep all those toppings in place.
⭐ Garnish for Extra Flair – Sprinkle a little extra shredded cheese, fresh herbs, or a drizzle of balsamic glaze just before serving for a chef’s kiss finish. 😘
⭐ Leftovers? Store in an airtight container in the fridge for up to 2 days—if they last that long!
And there you have it—your delicious, creamy, crunchy, veggie-packed crescent roll pizza is officially ready to wow your guests (or just yourself, because let’s be real—you deserve it!). 🎉
Now grab a plate, a slice (or three), and enjoy! 🍕✨
Veggie Pizza
Equipment
- Cutting board
- Butcher Knife
- Baking Sheet
- Medium Bowl
- Spoon
- Silicone Spatula
- Serving Tray
Ingredients
- 8 oz tube of crescent dough sheet
- 4 oz cream cheese, softened
- 1/2 cup sour cream
- 1 oz ranch seasoning packet
- 3/4 cup small broccoli florets,½ inch in size
- 1 roma tomato, diced
- 1/2 cup orange or yellow pepper, diced
- 1/2 cup shredded carrots
Instructions
- Prepare your veggies. Chop or shred them
- Preheat the oven to 375 degrees.
- Unroll the crescent sheet onto a non-stick baking sheet, spreading it out just slightly, then bake in the preheated oven for 8-10 minutes until golden.
- Remove from the oven and allow to cool for about 10 minutes.
- In a medium bowl, mix the cream cheese, sour cream, and ranch mix together until well combined, then spread over the crescent sheet.

- Top with veggies, and chill until ready to serve.
- Once ready to serve, cut into small pieces. To make 48 pieces, I cut it into 8 lengthwise, then 6 the other way. These are perfect 2 bite sizes for a party, but if making for just a small group, you can certainly make them bigger.
Why Veggie Pizza is a Kid-Approved Win! 🎉🍕
Getting kids excited about vegetables can sometimes feel like convincing a cat to take a bath—challenging, dramatic, and often messy. 😆 But veggie pizza? That’s a whole different story! Here’s why this recipe is a total parenting win and a kid-approved favorite:
1️⃣ It’s Pizza—Enough Said! 🍕
Let’s be real, if it has the word pizza in it, kids are already halfway convinced. The familiar concept of a cheesy, tasty slice makes them more open to trying new flavors—even if (gasp!) there are vegetables on top.
2️⃣ Fun, Hands-On Cooking Experience 👩🍳🧑🍳
Kids love helping in the kitchen, and this recipe is a great one for little hands! They can:
✔ Spread the creamy sauce (it’s like finger painting, but edible!)
✔ Sprinkle veggies (a little here, a little on the floor—it’s fine)
✔ Help cut the pizza (with supervision, of course!)
When kids help make their own food, they’re much more likely to eat it. Win-win!
3️⃣ It’s Packed with Sneaky Nutrition 🥕🥦
This pizza is loaded with fresh, crunchy veggies, but thanks to the creamy, ranch-flavored base and buttery crescent crust, kids hardly notice they’re eating something nutritious. It’s like a parenting magic trick! 🪄✨
4️⃣ Customizable for Picky Eaters 👶
Not all kids love every veggie, and that’s okay! With this pizza, you can let them:
✔ Pick their favorite toppings (No mushrooms? No problem! Extra cucumbers? You got it!)
✔ Arrange them in fun patterns (smiley faces, stripes, hearts—pizza art is a thing!)
✔ Start with just a few veggies and build up over time
5️⃣ Perfect for Parties, Playdates, and Lunchboxes 🎉
These bite-sized squares are easy to eat, mess-free, and totally shareable. Whether you’re serving them at a birthday party, packing them for lunch, or using them as a fun after-school snack, veggie pizza fits every occasion.
6️⃣ No Oven Needed After the Crust Bakes! ❄️
Unlike traditional pizza, this version is served chilled, meaning you can prep it ahead of time and have it ready for snack attacks at a moment’s notice. (Because kids are always hungry. Always. 😆)
Bottom Line?
Veggie pizza is a fun, tasty, and stress-free way to get more vegetables into your kids’ diet—without the dinnertime standoffs. Plus, when food is colorful, interactive, and delicious, kids are much more likely to enjoy it.
Now go forth, make some veggie-packed magic, and watch your kids actually ask for more veggies! 🎉🍕💚
Comment below if you will create this veggie pizza recipe!
What do you think about this recipe?
Related Posts:
- Extremely Easy Grilled Pork Tenderloin Recipe for Busy Moms
- Dirt Cheap Ground Beef Recipes for an Easy Dinner in 2024!
- Mastering Clean Food on a Budget to Live Deliciously Frugal
Pin to Pinterest:
Pin to Pinterest so other moms can find out about this Veggie Pizza Recipe!